简介
在 APP 漏洞挖掘或者 Web 站点渗透中经常碰到抓包双端加密的情况,这种时候逆向出加解密方式也不太方便进一步手工渗透甚至自动渗透。
在某天上网闲逛的时候发现了一个 Burp 的插件,叫 Galaxy,这个插件支持自己编写 Java、Python、JS 去加解密包。
插件使用注意事项
项目采用 Burp Montoya API 开发,Burp 版本不低于 v2023.10.3.7 。
项目使用 JDK 17 进行开发及编译,请确保启动 Burp 的 JDK 不低于 17。
项目使用了动态编译,请确保启动 Burp 的是 JDK,而不是 JRE。
如果你下载或打包后的 jar 包含 without-jython 字样,请在 Burp 的 Java environment(Settings -> Extensions)配置一个文件夹,并将 jython-standalone-xxx.jar 放在该文件夹。
使用方法
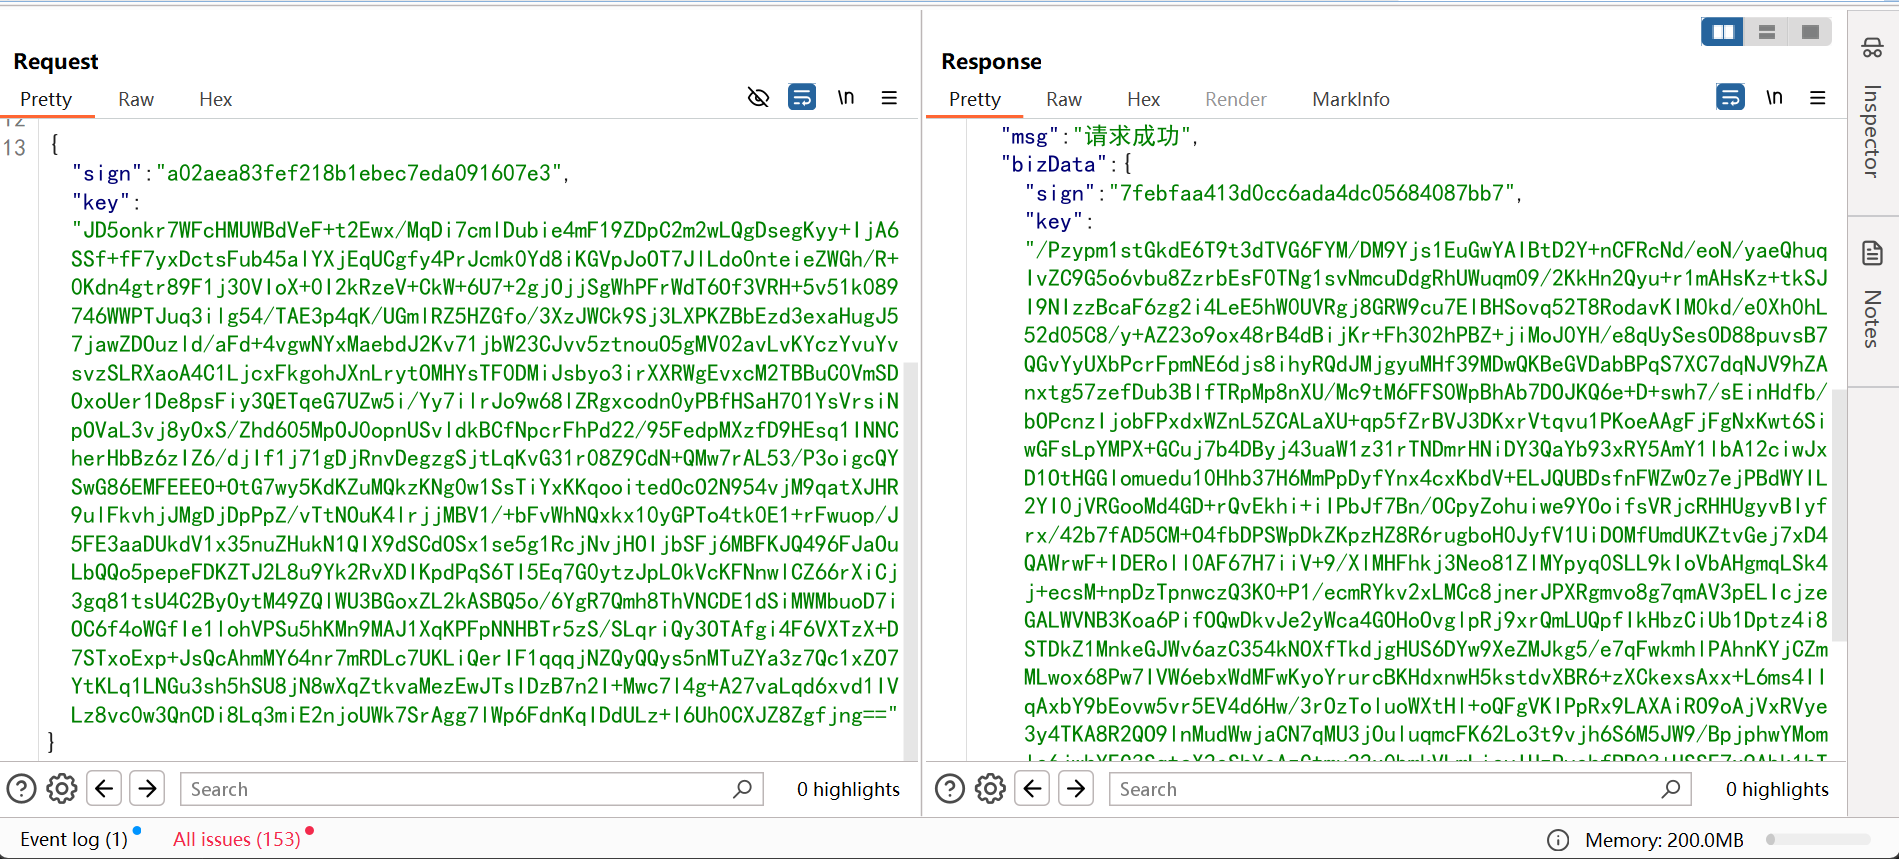
此处使用某个 APP 做举例,下为某个请求包和返回包

可以看到双端都加密了,而且还有签名保证防篡改。
逆向加解密方式
这里直接装上 frida hook java 加解密即可获取到加密方式和密钥。
数据使用 AES/ECB/PKCS5Padding 加密,密钥假设为 xxx。
签名的加密方式为
1
| 加密后的数据base64编码+请求头里的时间+请求头里的id+get请求中的token参数
|
这些内容都在请求包里,可以直接加密签名。
编写代码
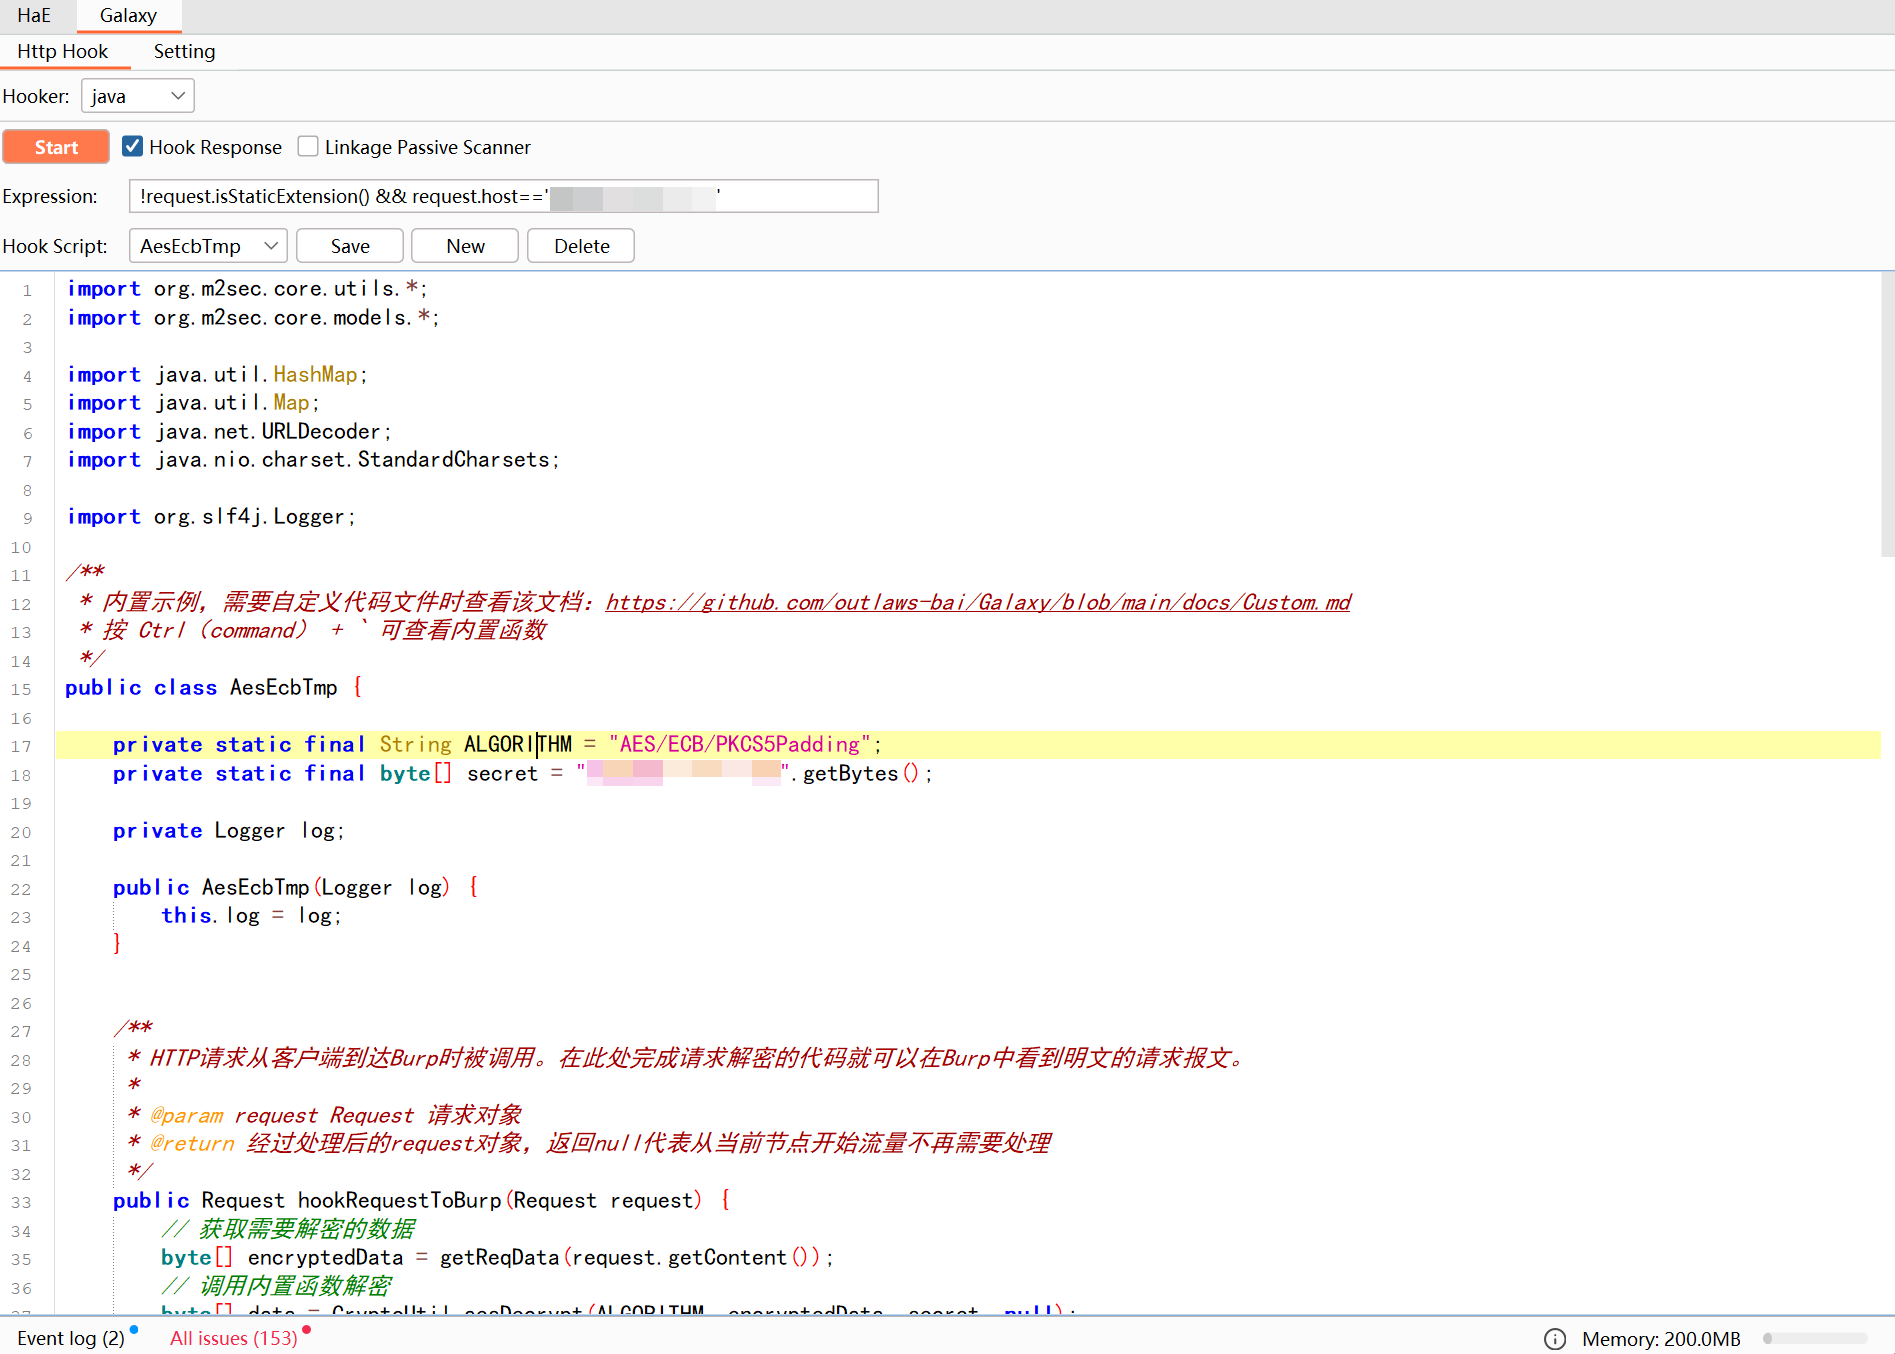
这是这个插件提供的默认 AES ECB 模板
1
2
3
4
5
6
7
8
9
10
11
12
13
14
15
16
17
18
19
20
21
22
23
24
25
26
27
28
29
30
31
32
33
34
35
36
37
38
39
40
41
42
43
44
45
46
47
48
49
50
51
52
53
54
55
56
57
58
59
60
61
62
63
64
65
66
67
68
69
70
71
72
73
74
75
76
77
78
79
80
81
82
83
84
85
86
87
88
89
90
91
92
93
94
95
96
97
98
99
100
101
102
103
104
105
106
107
108
109
110
111
112
113
| import org.m2sec.core.utils.*;
import org.m2sec.core.models.*;
import java.util.HashMap;
import java.util.Map;
import org.slf4j.Logger;
public class AesEcb {
private static final String ALGORITHM = "AES/ECB/PKCS5Padding";
private static final byte[] secret = "32byteslongsecretkeyforaes256!aa".getBytes();
private static final String jsonKey = "data";
private Logger log;
public AesEcb(Logger log) {
this.log = log;
}
public Request hookRequestToBurp(Request request) {
byte[] encryptedData = getData(request.getContent());
byte[] data = CryptoUtil.aesDecrypt(ALGORITHM, encryptedData, secret, null);
request.setContent(data);
return request;
}
public Request hookRequestToServer(Request request) {
byte[] data = request.getContent();
byte[] encryptedData = CryptoUtil.aesEncrypt(ALGORITHM, data, secret, null);
byte[] body = toData(encryptedData);
request.setContent(body);
return request;
}
public Response hookResponseToBurp(Response response) {
byte[] encryptedData = getData(response.getContent());
byte[] data = decrypt(encryptedData);
response.setContent(data);
return response;
}
public Response hookResponseToClient(Response response) {
byte[] data = response.getContent();
byte[] encryptedData = encrypt(data);
byte[] body = toData(encryptedData);
response.setContent(body);
return response;
}
public byte[] decrypt(byte[] content) {
return CryptoUtil.aesDecrypt(ALGORITHM, content, secret, null);
}
public byte[] encrypt(byte[] content) {
return CryptoUtil.aesEncrypt(ALGORITHM, content, secret, null);
}
private byte[] getData(byte[] content) {
return CodeUtil.b64decode((String) JsonUtil.jsonStrToMap(new String(content)).get(jsonKey));
}
private byte[] toData(byte[] content) {
HashMap<String, Object> jsonBody = new HashMap<>();
jsonBody.put(jsonKey, CodeUtil.b64encodeToString(content));
return JsonUtil.toJsonStr(jsonBody).getBytes();
}
}
|
可以看到有四个函数需要修改,底下只提供了两个 getData 和 toData
我先编写了 Python 手动解密了一次,发现需要进行 url 解码一次。下面直接给出一整个加解密的 Java 脚本
1
2
3
4
5
6
7
8
9
10
11
12
13
14
15
16
17
18
19
20
21
22
23
24
25
26
27
28
29
30
31
32
33
34
35
36
37
38
39
40
41
42
43
44
45
46
47
48
49
50
51
52
53
54
55
56
57
58
59
60
61
62
63
64
65
66
67
68
69
70
71
72
73
74
75
76
77
78
79
80
81
82
83
84
85
86
87
88
89
90
91
92
93
94
95
96
97
98
99
100
101
102
103
104
105
106
107
108
109
110
111
112
113
114
115
116
117
118
119
120
121
122
123
124
125
126
127
128
129
130
131
132
133
134
135
| import org.m2sec.core.utils.*;
import org.m2sec.core.models.*;
import java.util.HashMap;
import java.util.Map;
import java.net.URLDecoder;
import java.nio.charset.StandardCharsets;
import org.slf4j.Logger;
public class AesEcbTmp {
private static final String ALGORITHM = "AES/ECB/PKCS5Padding";
private static final byte[] secret = "xxx".getBytes();
private Logger log;
public AesEcbTmp(Logger log) {
this.log = log;
}
public Request hookRequestToBurp(Request request) {
byte[] encryptedData = getReqData(request.getContent());
byte[] data = CryptoUtil.aesDecrypt(ALGORITHM, encryptedData, secret, null);
request.setContent(URLDecoder.decode(new String(data), StandardCharsets.UTF_8).getBytes());
return request;
}
public Request hookRequestToServer(Request request) {
byte[] data = request.getContent();
byte[] encryptedData = CryptoUtil.aesEncrypt(ALGORITHM, data, secret, null);
byte[] body = toServerData(encryptedData, request);
request.setContent(body);
return request;
}
public Response hookResponseToBurp(Response response) {
byte[] encryptedData = getResData(response.getContent());
byte[] data = decrypt(encryptedData);
String encb64data = '"' + CodeUtil.b64encodeToString(encryptedData) + '"';
String urldecodeData = URLDecoder.decode(new String(data), StandardCharsets.UTF_8);
String body = response.getBody();
response.setContent(body.replace(encb64data, urldecodeData).getBytes());
return response;
}
public Response hookResponseToClient(Response response) {
byte[] data = response.getContent();
byte[] encryptedData = encrypt(data);
byte[] body = toClientData(encryptedData);
response.setContent(body);
return response;
}
public byte[] decrypt(byte[] content) {
return CryptoUtil.aesDecrypt(ALGORITHM, content, secret, null);
}
public byte[] encrypt(byte[] content) {
return CryptoUtil.aesEncrypt(ALGORITHM, content, secret, null);
}
private byte[] getResData(byte[] content) {
Map<?, ?> bizData =(Map<?, ?>) JsonUtil.jsonStrToMap(new String(content)).get("bizData");
return CodeUtil.b64decode((String) bizData.get("key"));
}
private byte[] toServerData(byte[] content, Request request) {
HashMap<String, Object> jsonBody = new HashMap<>();
jsonBody.put("key", CodeUtil.b64encodeToString(content));
Headers headers = request.getHeaders();
Query query = request.getQuery();
String key = CodeUtil.b64encodeToString(content);
String tmp = key + headers.get("Request-Date").get(0);
tmp += headers.get("Request-Id").get(0);
tmp += query.get("utoken").get(0);
jsonBody.put("sign", HashUtil.calcToHex("MD5", tmp.getBytes(), null));
return JsonUtil.toJsonStr(jsonBody).getBytes();
}
private byte[] getReqData(byte[] content){
return CodeUtil.b64decode((String) JsonUtil.jsonStrToMap(new String(content)).get("key"));
}
private byte[] toClientData(byte[] content){
return null;
}
}
|
使用
将代码复制进插件区域之后,点击 Start 即可

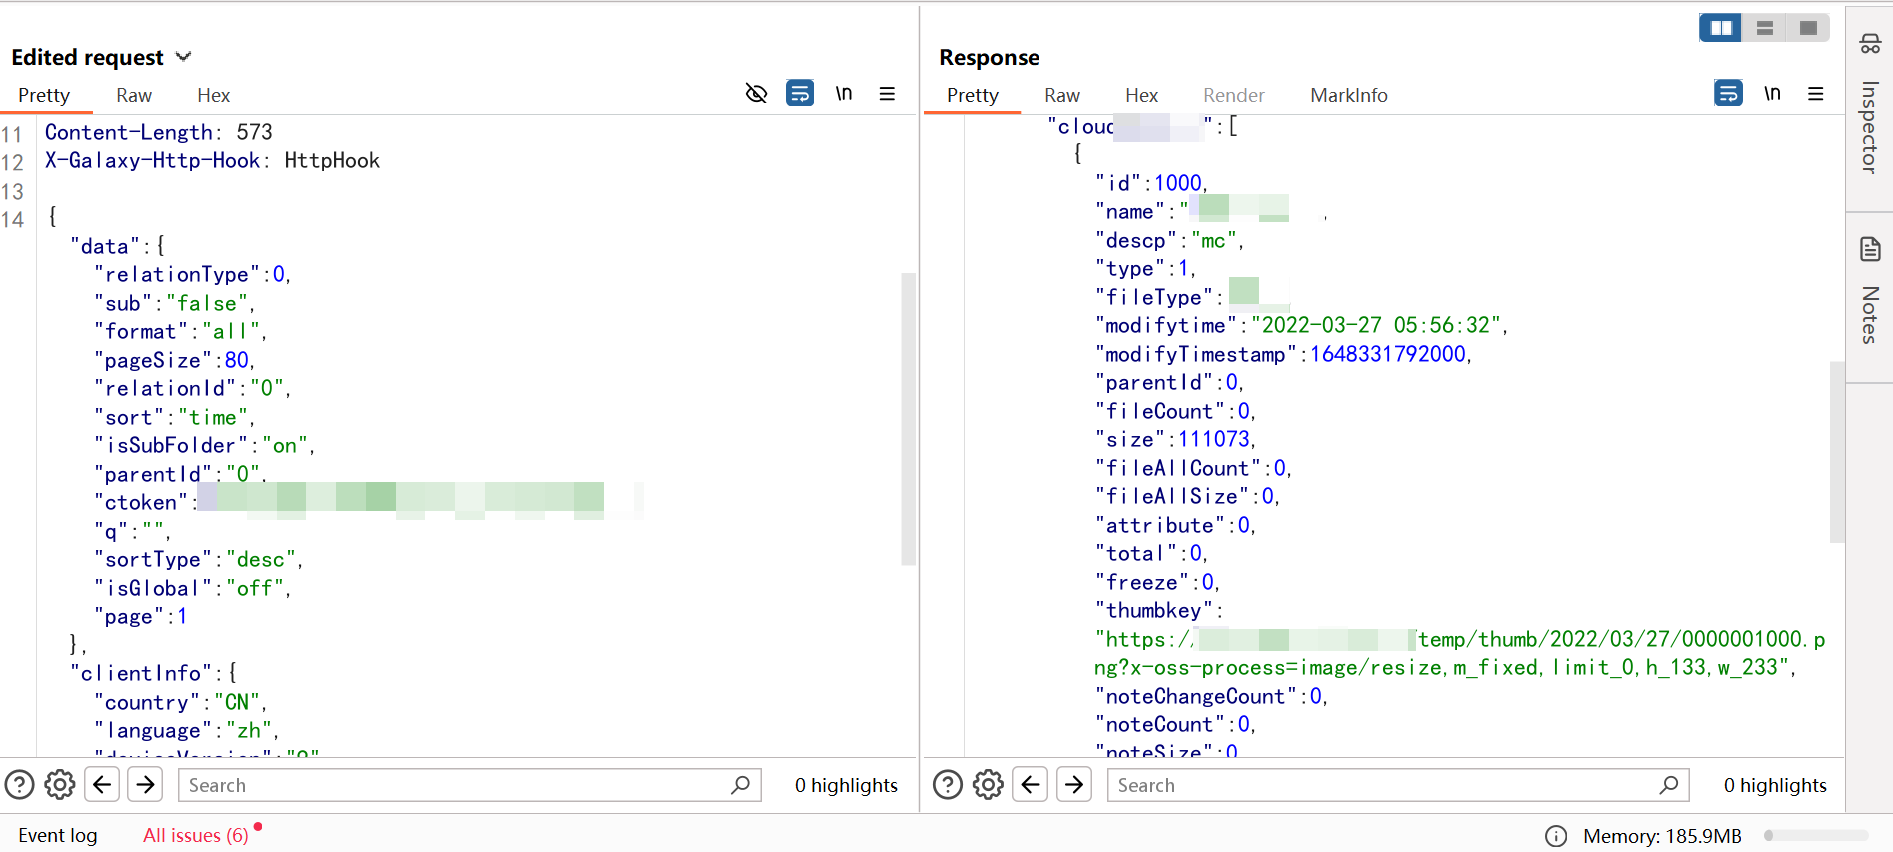
以下为请求过程中自动解密内容

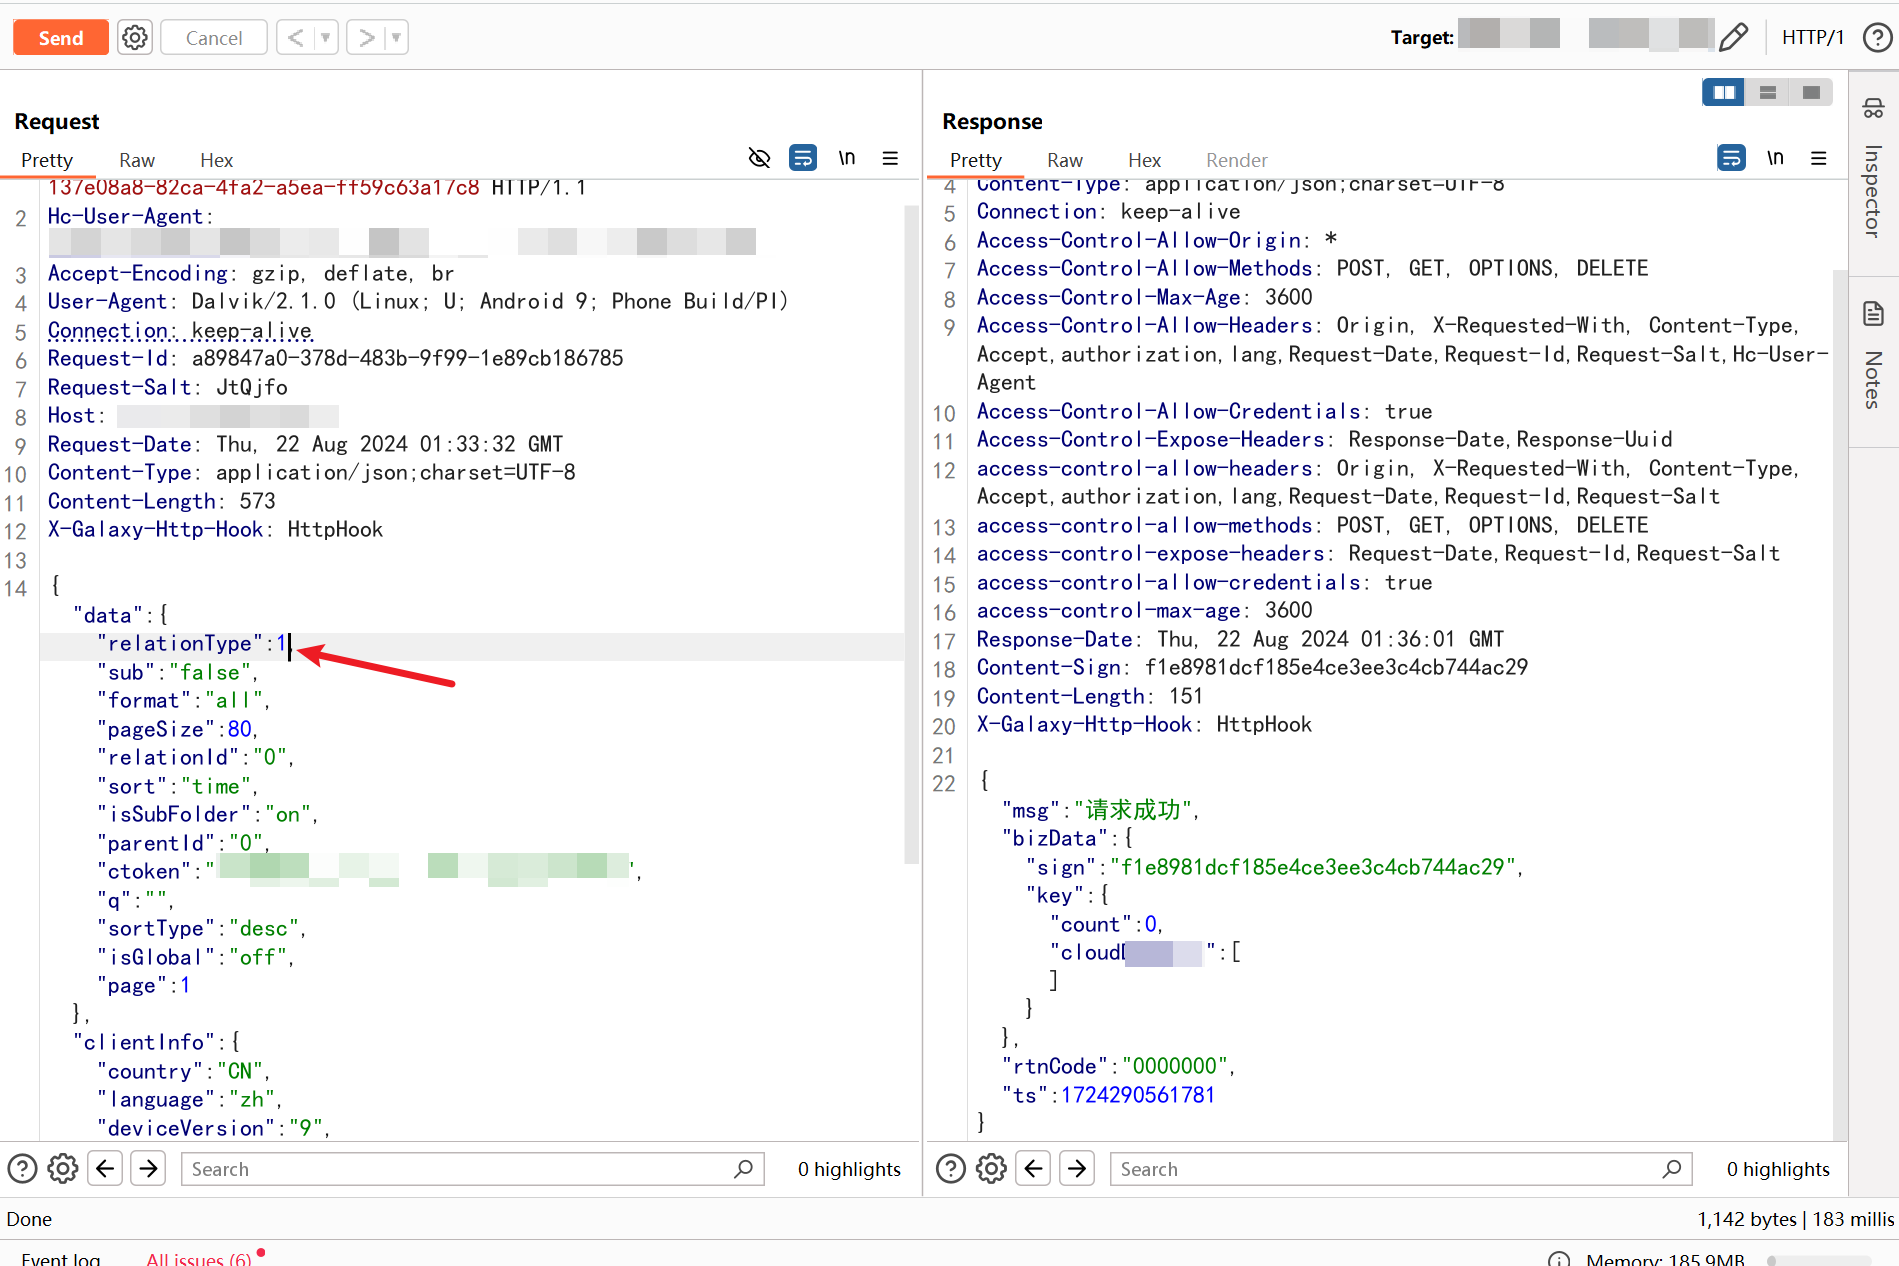
我们直接把解密后的内容发送到 Repeater,然后可以直接进行编辑,这个插件也会自动加密

这个插件也能在 Intruder 中使用,而且能与 sqlmap 联动
注意事项
在页面新建插件的时候,注意类名要跟文件名相同,构造函数名称要跟类名相同,其实这个都是 Java 基础内容了,不过我确实太久没用,忘记了,折腾了一小会儿才想起来这么个事儿。


